3D Modelling Context

Different types of 3D Model Development
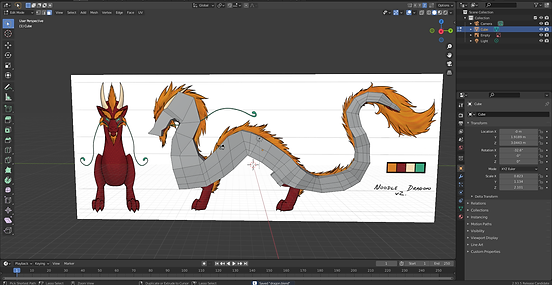
Box Modelling - Box modelling is an easy way to build up a 3D shape, starting with a basic cube or sphere the user can build up geometry using reference images and mirroring tools either side of the ref image to help. From the basic box model, the artist can use vertex/edge manipulation to tweak more detailed areas of the model, they can then build up a front perspective and other extremities on the sides (E.g. arms and legs). Loop cut tools are used to give the artist more points to work with and bevels for adjusting the impact of vertexes on each other. A subdivision surface modifier is typically used in most of these techniques after the initial low poly model is built to multiply the surface poly count and allow for more detailed textures/shapes to be made.
Often this form of modelling is used in geometric shapes like buildings, vehicles and other man made objects. Below is an example of my own Box modelling practice using a reference image found online. There is also a building image to show the angular linear shapes often created using box modelling.


Polygon Modelling - This modelling technique is similar to box modelling but uses flat planes or single vertices primarily to construct an object, This extra control over the shape of an object is ideal for more organic/detailed models but will still use loop cuts and subdivision surface mods. This gives the user a lot of control over how the object is formed and where angles/edges sit. I have used this method for leaves of plants as they are relatively flat with some curvature. through the centre, achieved with loop cuts and manipulation. Mirror tools are often used in most of these techniques to achieve a more polished and precise final model.

Nurbs and Curve Modelling - NURBS (Non-uniform rational b-spline) are smooth curved surfaces that can be manipulated to form organic shapes that would otherwise be difficult to replicate with box modelling. Nets of curves are created with points in-between which allow the user to bend or tweak the overall shape. This technique is primarily used in CAD engineering as opposed to VFX work but is still useful to know. The purpose of the curves is to retain their proportions when upscaled like vectors unlike box geometry which will distort and lose shape when enlarged. I have used this kind of curved spline method to construct the main body of my dragon, as well as his hair strands.

Digital Sculpt Modelling - This modelling involves digitally sculpting a model using specialist software/tools like Zbrush, Mudbox and Blender Sculpt mode. The process is a lot like clay sculpting with tools that can add to/displace the digital clay form until the user is happy with it. Typically this kind of modelling is used for high detail 3D models and characters that aren't necessarily fully animated or real-time rendered, If the user is starting with a box model there would need to be a lot of geometry for the digital brush to use/move, otherwise subdivision surface mods (multi-resolution mods) could be used to cheat this and allow for more detail to be added without the initial basic mesh being affected as much. Blender uses dynamic topology instead to automatically multiply areas affected by the brush in real time., depending on the level of zoom/detail this will be adjusted by the software. After sculpting, a Re-mesh plugin/node is used to reorganise the mesh shape to the new structure. For my model I have used a subdivision surface modifier to increase the polycount and allow for more detailed sculpting.

3D modelling types in Practice:
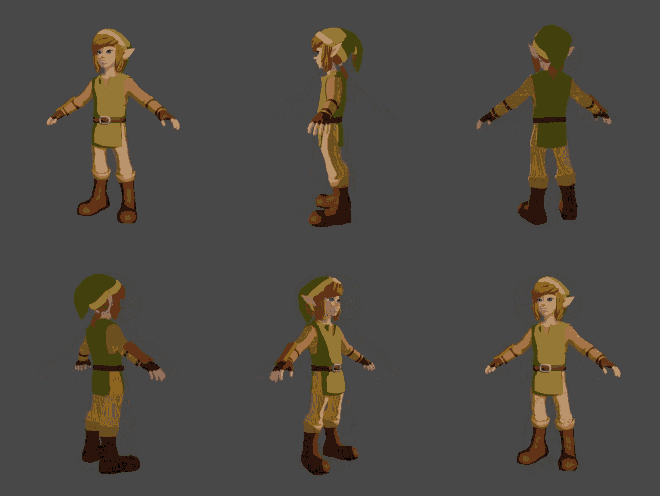
To create an organic shape/humanoid character It'd be a good idea to use either photo-scan modelling to import a posed 3D image to convert into mesh and work on using sculpting tools. Characters are usually imported in a T-pose to make rigging the arms less complex, the scale of the character needs to be correct compared to it's environment otherwise it will be either too complex or too basic to be scaled up/down to fit within a scene. Depending on the topology, clothing mesh and detail of the character, it may have to be animated in a certain way to avoid glitches or mesh issues later on- this is something to consider when changing or adding to the topology of 3D models that will be used for animating, it's important to note that a rig (skeletal system and musculature) would also have to be added inside the model's mesh at some point in order to move it, weight painting the rig to the model ensures the software understands how the model should pose as well as any secondary movements. Higher poly counts allow for more detail to be added so subdivision surface modifiers help by altering the surface poly-count in order for artists to sculpt further detail or patterns without permanently changing the basic underlying mesh. It can then be baked and rendered out for a final image export. Typically models are exported as an FBX file, read by Autodesk software and Blender. Blend files are specific to Blender software so a Blender model needs to be exported as a selection/scene in FBX or OBJ format.


My chosen 3D Modelling Software for this Project:
I have chosen to primarily use Blender to create my Dragon model, I have used similar programs like 3DSMax previously but enjoy Blender's easy-to-use workspaces and tools. There is an inbuilt sculpting mode which will be helpful when moulding more complex and detailed areas of the dragon like the face, claws and tail. I have experience using the UV wrap, input/texturing nodes and modifiers like mirroring and subdivision surface for the mesh. I am also able to add armatures later on and use the 'Pose mode' to render out the final result.
